Decorating a flower pot with felt inserts. Flowers in a felt pot Ideas for planters: Video
Photo after:

Well, now the story of reincarnation itself. I really wanted to use felt or felt decorations in the decor of the pot. But I understood that this was not entirely practical (felt can be accidentally soiled while watering or spraying a plant, it can also lose its appearance due to moisture getting on it). How to be? I did not want to give up the idea with felt. I began to think and decided to make felt inserts-decor with a zipper. Thus, they can be removed when watering or spraying and save the felt from damage. Frankly, I was greatly fascinated by the idea of a sort of "clothing" for the potty. Sounds weird, but why not give it a try?
I bought 6 zippers in three colors (the main thing is that they are double-sided!), I measured the diameter of the pot, marked with a marker where the felt inserts would be, and where the main decor would be. I cut the zippers to the right size, sewed up the cut (so that the dog does not jump off) and glued one part of the zippers to the pot (the second will be sewn onto the felt). I used titanium glue. A day later, after the glue "grabbed", the husband "welded" the most stress-prone gluing points (he heated a metal tool on fire and burned the lightning with it, soldering it into plastic).

I was working on two projects at the same time and preparing felt decorations for a house on the wall in the baby's room and for decorating a potty, so the photos are used in two headings. I gladly sewed flowers and leaves from felt, embroidered them with beads and floss.


I cut out inserts of the right size from felt, sewed the second part of the zippers to them and glued the flowers with leaves.

Using the "patchwork gluing" technique, I sewed 3 identical Tilda hearts.

Now it was necessary to decorate the plastic and especially the places where the zippers were glued together. I used a proven method - I degreased the pot, smeared the surface with PVA glue and sprinkled it with semolina. After the first layer dried, I applied the second. When the semolina was completely dry, I diluted the light green paint in the palette and covered the entire surface with semolina with it. I carefully varnished the pot and fastened the decorative inserts into place.
I glued twine around the circumference of the pot, after sewing buttons into the marked places. Felt hearts-Tildes are hung on the buttons, which make the pot even more elegant and original.

(First insert)

(second insert)

(Third insert)

(Pot with decor - heart)

(or without hearts)
The money tree has found a new apartment, and I hope that in such an elegant and positive pot it will grow freely and well. I am very pleased to look at an unusual pot, not only because of its bright colors, but also because I was able to overcome a lot of difficulties when creating it, trying to combine the incompatible. This is one of my most unusual projects from an engineering point of view.
Time will tell how practical my decision to create removable decorative elements will be, but for now I look at it and smile, I like it!


The original decorative decoration in the style of Handmade - flowers made of felt. It's easy to do and pretty quick, but it turns out very unusual and beautiful.
Felt, it should be noted, is a favorite material for needlework masters. How many opportunities it opens up for creating a designer gizmo. Judge for yourself how original the flower brooch will look on a black dress. And in general on a dress of any solid color. After all, sometimes a small accessory is enough to make the same outfit look fresh and new. And with felt decorations, you can complement the appearance of the box, arrange a postcard or photo album. Felt flowers look original on handbags, hairpins, as a decoration for hairbands, as well as in the design of any gift souvenirs.

A few words about what is felt, and what are the reasons for its popularity. Felt is nothing more than felt made from the wool of a rabbit or goat. In turn, felt is a non-woven textile. Wool or synthetic fibers can be used as a base. The choice of wool is due to the peculiarity of its structure. The fact is that the edges of its fibers have so-called "notches". This ensures good adhesion of the fibers to each other.

Making flowers from felt with your own hands is an exciting and not difficult task. And all this thanks to the pliability of the material. It differs in its density and thickness. Felt can be bought at almost any needlework store or ordered online. More often on sale there are felt sheets with a thickness of 2-2.5 mm and a size of 30 * 40 cm, as well as a thickness of 4 mm with a size of 20 * 30 cm.
At the stage of choosing shades, you can show all the richness of your own imagination. The creative process is fully consistent with the author's intent and imagination, and therefore products can be created in any color scheme. Fortunately, the modern market for needlework products makes it easy to realize even the most daring ideas. Someone uses ready-made felt sheets with floral prints. Others prefer to combine the original contrasting colors. The boundaries of this process are determined solely by the taste of the master.
Materials for flowers from felt
- scissors
- glue for fabric
- pins
- thread and needle
- all kinds of beads, beads and buttons of different sizes for decorating flower cores;
- floss threads, the shades of which should differ by several tones in one direction or another from the original color of the felt. They are used to decorate the edges of future flowers.
Felt flowers, patterns of which can be found in large quantities in the catalogs of online magazines, as a rule, are very plainly designed. An ordinary chamomile pattern can be used as a basis. But the work, made in several layers of contrasting or monochrome colors, acquires a completely different idea. Cut out paper petals. This will be the template. Here are some ready-made patterns for felt flowers:


Consider the assembly process using the example of a flower made according to this pattern:

First, you need to recreate the template pattern directly on the fabric.


Then the edge of each petal is sheathed with a skillful seam using floss or not processed at all.
We put the petals on top of each other from largest to smallest (or vice versa) and sew in the center to form a deepening of the future flower (you need to sew tightly). And let's move on to creating the core. A circle cut out of felt is planted on glue and placed in the middle of the flower.

Sequins, pre-prepared beads, beautiful beads will give the author's originality to the resulting work of art.
Depending on the intended purpose of the product, we attach a pin or sew an elastic band to its reverse side.

We post a few more photos of flowers that inspire new creations. Each of these flowers uses French knots as an additional decoration:


The felt flowers presented below are master classes from the masters of needlework. These works will help beginners master the simple creativity of creating decorative floral elements.
Felt rose (master class)
This amazing accessory is ready to "settle" on an evening dress or coat of its resourceful owner.


Let's start at the base of the flower. To do this, prepare a circle, the diameter of which will be 10 cm. Cut out semicircular petals along the edges of the circle, gradually moving from the outer edge inwards.

The central part is rolled up, thus forming the core of the future rose.

It must be fixed with a pin and filled with a layer of glue. After the glue dries, it is necessary to wind the rest of the felt on the resulting bud and close the cut from the bottom side.


Here is such a wonderful rose will turn out in the end!

If you make a few roses, glue them to a piece of fabric and sew on a metal clasp, you will get a wonderful brooch!

For clarity, a few more roses made according to a similar principle:


How to decorate from felt shows Tsvoric (TSVORIK) (music by Key.peter):


Felt violet (master class)

Materials for work:
- felt (sheets of two different colors: lilac for petals, green for leaves)
- scissors
- threads, the color of which must match the color of the violet

Let's prepare 5 templates for future petals (diameter - 4 cm):

Take one of the petals in your hands and fold it in half twice. We get a petal in the form of a corner:

With a couple of stitches we attach a corner to one of the blanks:

Repeat the steps for the rest of the corner petals. To achieve the desired neat effect, carefully monitor the direction of the petals (they should be directed in one direction):


At the end of the work, the flower should be well straightened:

Let's move on to cutting the leaves:

We sew them together:

Raising the petal, we fasten the leaves with the base:

We enjoy the result!
With such flowers you can decorate, for example, a rim:

Chrysanthemum from felt (master class)

The strip of felt must be folded in half (in width). For reliability, fasten with sewing pins.

On the side where the fold was made, we form the same cuts.

We sew a strip with matching threads with large stitches and roll it into a roll, forming petals. We fix by sewing the layers together in several places.

It remains to straighten the felt and form beautiful flower!
This flower will be a large number petals.

Having cut out rectangles from felt, we have a fringe on one edge, and round off the other. Petals should be about 20. They should all be different sizes.

We pinch the edge that was rounded and fix the petal with glue.

We form a flower:

Cut out a yellow stripe. Cut it on one side. Then we roll it up and fix it with glue. We get the finished core.

To use the flower as a flower, you need to attach a small piece of felt to the base from the wrong side, and then chop everything with a pin or a metal fastener.
Felt hydrangea (master class)

Flower materials:
- scissors
- glue gun
It is necessary to cut out 13 felt circles of the following sizes: 1 piece - 3 cm in diameter, 12 pieces - 2 cm in diameter.

We apply glue (hot) to the center of each circle and thus form the future petals.

We take a large circle and, using a glue gun, distribute 4 prepared petals around its perimeter.

Glue the next four between these petals. Repeat until the circle is filled.

Pillow with flowers made of felt

First, cut out the petals from the felt:

Using the template, we prepare 6 felt circles (diameter - 12cm)

Glue the petals to one of the circles using hot glue.

Gradually add the next row (total - 4)

We create the middle. Fold the circle twice:

Fold in half again:

Trimming the end:

Smeared with glue, attach to the blank of the future flower.

5 circles go to the middle.

The result should be such a charming flower:

Decorate the pillow with the resulting flower.
And now the most interesting! When creating flowers from felt with your own hands, you should carefully look at the various options for their inflorescence and the shape of the petals in wildlife. It is this observation that will tell the needlewoman the shape and ratio of the sizes of the necessary blanks.
The whole charm of this creativity lies in the fact that absolutely any of the colors existing in nature can be reproduced in felt: both delicate, and contrasting, and lush multi-colored ... You just need to choose the color of felt that matches the future shade of the product. Then cut out blanks in the form and circles for the future core, first from paper, and then from fabric.
At the last stage, it is necessary to assemble all the prepared elements with glue or stitches so that a flower is obtained. And then, based on our own ideas about how to reflect the images of wildlife in art and creativity, we decorate our work with all sorts of improvised means. It can be embroidery or glass beads or shiny sequins. Everything that the soul desires.
See an example of decor in the Lucky Fox Felt Poppy tutorial:
Decorations for clothes or even interior items can be made with your own hands. Today we invite you to learn how to make beautiful flowers from felt - the favorite material of many needlewomen.
It is not difficult to make flowers from felt, and it takes a little time to create
It is not difficult to do this, and it takes a little time to create flowers. And as a bonus, we will look at an example of creating a felt topiary.
What are
Felt flowers are a decoration that can be used for completely different purposes. They can be of various shapes or colors, and have from one to five layers (and even more). Each of the options will look special. You can also create elegant topiary from them, which will harmoniously complement the interior of any home.
This is interesting: Felt is a felt made from the wool of a rabbit and a goat. It is a non-woven textile fabric. Wool and synthetic fibers are often used for the base. The edges of the wool have small “notches”, this is what provides an excellent adhesion of the fibers to each other.

Felt is often used to make various fakes.
Necessary tools and materials
- Felt;
- Glue gun or Moment glue;
- Scissors;
- Needle and thread;
- Tricks and pins;
- Decorating elements (beads, pebbles, sequins, etc.);
- Hearts for flowers (can be bought at needlework stores);
- Mouline threads (for processing edges on some products).
It is very easy to create flowers from felt, because this material is malleable enough to work with. It is distinguished by its special density and thickness. Most often, multi-colored sheets of felt are on sale with a thickness of 2-2.5 millimeters and a size of 30x40 centimeters. Slightly less often are sheets 20x30 centimeters in size with a thickness of 4 millimeters. You can choose any option you like or create a new one, because handmade products are always exclusive.
Patterns and patterns

To create flowers from felt, you can choose completely different color templates

From these patterns you can make voluminous flowers

From this template you can make a flower with many leaves
A huge number of patterns can be found in specialized stores and online catalogs. Most often, these are simple uncomplicated figures that even a beginner can sew. But if you wish, you can choose a more complex pattern, for example, for a multi-layered flower.
Step by step instructions for making felt flowers
In our article you will find several different options for making flowers from felt. The master classes below will help beginners master various techniques for creating beautiful jewelry.
Rose
To create a rose you will need:
- Felt;
- Scissors;
- Needle and thread;
- pins or glue;
- Sample.
Step-by-step instruction:
- Start at the base of the flower. Prepare a circle with a diameter of 10 centimeters. Cut semicircular petals along the edges, gradually moving from the outer to the inner edge.
- Roll the center piece into a roll to create the center of the felt.
- It must be secured with a pin or Moment glue. If you decide to use glue, wait for it to dry completely and wrap the rest of the fabric on the resulting base. Fasten the cut so that it is not visible.
Photo gallery: Making a cute rose

Illustration for paragraph 1

Illustration for paragraph 2

Illustration for paragraph 2

Illustration for paragraph 3

Illustration for paragraph 3

It will look like roses made of felt of different colors
Violet
For work, prepare the following materials:
- Fabric (several sheets of different colors - for the base and petals);
- Scissors;
- Threads in the tone of felt for the petals;
- Needle;
- Sample.
Step-by-step instruction:
- Prepare 5 templates for future petals with a diameter of 4 centimeters.
- Take one of the petals and fold it in half a few times. You should get petals folded in a corner.
- Attach the corners to one of the blanks with a few stitches.
- Repeat the steps on the remaining leaflets-corners. To make them neat, follow the direction of the stitches and petals. They must be directed in the same direction.
- After finishing work, straighten all the petals.
- Sew them together.
- Lift the petals up and fasten them to the base of the violet.
Instructions on step by step photos

You don't need a lot of tools to make a felt violet.

Illustration for paragraph 1

Illustration for paragraph 2

Illustration for paragraph 2

Illustration for paragraph 3

Illustration for paragraph 3

Illustration for paragraph 4

Illustration for paragraph 5

Illustration for point 6

Illustration for paragraph 7

This is what a felt violet will look like
Chrysanthemum
An original and beautiful flower in the form of a chrysanthemum can be used as a decoration for clothes or accessories, such as handbags.
You will need:
- Textile;
- Scissors;
- pins;
- Threads;
- Thick needle.
Step-by-step instruction:
- Fold the strip of fabric in half. Fasten it with sewing pins.
- From the side of the fold of the material, make the same cuts at the same distance.
- Sew the strip with large stitches and roll it into a roll, creating petals. Sew these layers together, thus holding the petals together.
- Straighten the felt and shape the flower.
Master class on creation

Illustration for paragraph 1

Illustration for paragraph 2

Illustration for paragraph 3

This is what the finished flower will look like
Peony
To create a peony, you will need to make a lot of petals. With a little time, you can make a very unusual and stylish flower.
Necessary materials:
- Felt of several colors;
- Scissors and pins;
- Glue "Moment";
- Needle and thread.
Step-by-step instruction:
- Cut out rectangular parts, cut the edges from one so that their outline resembles natural shapes. You can look at photos of live peonies. On the other hand, round them up.
- You should have about 20 petals of the same size and shape.
- Attach the rounded edge to the other petal with glue.
- Shape the product.
- Cut out a strip of yellow felt. Cut it off at one end. Next, roll it into a small roll and fix it with glue in this position. This will be the center of the peony.
Do-it-yourself pink-white peony in the photo

Illustration for paragraph 1

Illustration for paragraph 2

Illustration for paragraph 3

Illustration for paragraph 5

It will look like a finished peony made of felt
Hydrangea
To make hydrangea, prepare:
- Felt;
- Glue "Moment";
- Scissors.
Step-by-step instruction:
- Cut out 12 identical circles with a diameter of 2 centimeters and 1 circle with a diameter of 3 centimeters from felt.
- In the middle of each finished circle, apply glue and shape the petals.
- Take a large circle and use glue to attach 4 prepared petals to it.
- Then, in the same way, on the basis, fix the following parts until completely filled.
Photo gallery: Beautiful hydrangea in stages

Illustration for paragraph 1

Illustration for paragraph 2

Illustration for paragraph 3

Illustration for paragraph 4

Two handmade felt hydrangeas
big flower
This flower will be slightly larger than the previous options, but it can also be used as decoration for home decoration or clothing.
Necessary materials:
- Felt;
- Scissors;
- Glue gun;
- Cores for the middle of the flower (sold in needlework stores);
- Sample.
Step-by-step instruction:
- First, prepare the base for the felt petals.
- Draw 6 circles with a diameter of 12 centimeters on the fabric and cut them out.
- Use hot glue to secure the petals to one mug.
- Gradually add subsequent rows. In our example, there are 4.
- Make a flower core. Fold the circle twice.
- Then fold it in half again.
- Trim the ends.
- Lubricate the edges of the core with glue and fix in the center of the base of the flower.
- For the middle you will need 5 circles.
Large flower for decor on step by step photos

To make a flower, prepare scissors, a pencil and felt

Illustration for paragraph 1

Illustration for paragraph 2

Illustration for paragraph 3

Illustration for paragraph 5

Illustration for point 6

Illustration for paragraph 7

Illustration for point 8

Illustration for point 9

Illustration for point 9

The finished flower can be used as a decorative element
Video: How to make felt flowers?
Topiary
Topiary is also called the tree of happiness. Recently, this decoration has gained incredible popularity. Topiaries are made from different materials. In our master class, we will teach you how to make such a decoration-bouquet of felt. Follow the suggestion below step by step instructions. The finished product will be an excellent decoration for the interior of your home.
This is interesting: Topiary - figured cutting of trees in order to give them interesting and unusual shapes.
"Pink Chrysanthemum"
For work you will need:
- Felt (8 sheets measuring 30 by 28 centimeters);
- Sisal (greens);
- planter;
- Green thread (it is better to use wool);
- Satin ribbon 1 cm wide and 1 meter long;
- Card;
- Styrofoam ball with a diameter of 10 centimeters;
- Butterfly on a shelf;
- Ladybug;
- Green paper (1 sheet);
- A stick (in our example, a straight one is used, but you can also take a curved one. It is sold in a needlework store);
- Cement and sand (it depends on the size of the pot used, the minimum material required is 200 grams);
- Water;
- Glue gun;
- Scissors.
Step-by-step instruction:
- First make a crown. To do this, cut the felt into strips 7 centimeters wide.
- Make a chrysanthemum from each strip.
- Cover the ball with green paper. Attach the finished flowers to the foam ball with glue.
- Now start creating the trunk. Take a stick and glue it tightly with green woolen thread.
- When the base is completely dry, attach the crown to it with glue.
- In a pot, knead a thick solution of cement and sand (1: 1) and place the trunk in it exactly in the center.
- Place a decorative butterfly nearby.
- Top the cement with sisal. Set the topiary base aside until the cement has completely dried.
- Start decorating. Take a card and pierce it with a hole punch. String it on a satin ribbon and secure under the topiary crown with a bow.
- Plant a ladybug in the grass.
- If desired, you can attach a note with the inscription "handmade" to the pots.
This topiary will be a wonderful gift for your family and friends.
Topiary of multi-colored chrysanthemums (work scheme)

Illustration for paragraph 1

Illustration for paragraph 2

Illustration for paragraph 3

Illustration for points 4-6

Illustration for paragraph 7

Illustration for point 8

Illustration for point 9

Illustration for paragraph 10

Illustration for paragraph 11

Topiary with chrysanthemums will serve as a great addition to your interior

Such a topiary can be presented to relatives or friends.
Bouquet using brads
Necessary materials:
- Felt (green and white);
- Mini brads (300-400 pieces);
- Styrofoam ball (diameter 13 centimeters);
- Scissors;
- Stick;
- Medium flower pot;
- Paint or thread for the barrel;
- Glue gun;
- Wood shavings or Spanish moss.
Step-by-step instruction:
- Cut the felt into squares of the appropriate size. Determine the quantity yourself.
- All blanks must be the same size (prepare the diagram in advance).
- You can cut them with scissors or a special machine.
- In our example, more than 300 flowers are used. They can all be prepared at once or made as needed.
- Insert mini brads into the middle of each flower and secure them with glue.
- Next, insert the finished flowers into the foam base.
- Plant the flowers as closely as possible to each other so that their petals are directed upwards.
- We recommend alternating the process of cutting flowers and attaching them to the ball. For comfortable work, it is better to place the foam base in a flower pot.
- Do not leave free space so that the crown is full and lush, without gaps.
- After you have completely made the crown, proceed to create the trunk. Dye the stick in the desired color or wrap it with woolen threads. After the paint has dried, put on the crown and place the stick in the pot.
- For reliable fastening, pre-lubricate the end of the stick with glue.
- Start decorating the pot. Apply glue to it and cover with moss or shavings.
How to do it step by step

Illustration for paragraph 1

Illustration for paragraph 1

Illustration for paragraph 3

Illustration for paragraph 3

Illustration for paragraph 4

Illustration for paragraph 5

Illustration for paragraph 5

Illustration for point 6

Illustration for paragraph 7

Illustration for paragraph 7

Illustration for point 9

Illustration for point 9

Illustration for paragraph 10

Beautiful topiary with decorative ornaments in the middle of the flower
Photo gallery of other options

Butterfly made of felt harmoniously complements the composition

Bright and interesting floral arrangement will be a great addition to your interior.

Delicate topiary in light green-pink flowers will appeal to any girl

A good example of decorating a topiary

With a little effort, you can create such an amazing tree that does not need to be looked after.

Purple is the trend of the season
The beauty of felt is that it is very malleable and therefore easy to work with. The edges of the felt do not crumble and do not require special processing. And the density of the fabric allows you to form different flowers from it, which perfectly keep their shape. We hope you will see for yourself!
Spring is just around the corner, which means it's time to create beautiful flower pots with your own hands. If you want to decorate your clay pots or disguise disposable containers before gifting plants, check out a few ideas to help you style your green pets.
Cache-pot in decoupage technique
You can add bright spring colors to your home decor with ordinary decorative napkins. There is a special technique for decorating various surfaces - decoupage. It consists in applying thin paper with an ornament to various surfaces using PVA glue. Then the surface is protected from damage with an acrylic-based varnish. Usually, special sheets or three-layer napkins are used for decoupage, from which the topmost layer with the picture is removed. All materials for this decoration technique are very affordable and it is not difficult to find them on sale.
Preparation of materials for decoupage
Before starting work, prepare necessary materials: take ordinary clay pots, patterned napkins, acrylic paints, scissors, PVA glue and a brush. You will also need acrylic paint. If you want to age the surface, use a special varnish - for craquelure. To transform a clay pot for flowers with your own hands, first rinse them well, dry them, and then paint them with white acrylic paint or any other - the main thing is that it matches the background of the napkins. Let the paint dry completely. At this time, you can start cutting out the motif from napkins. A repeating image is called a motif. Apply PVA glue to the surface of the planter and glue the motif with a brush. Gently smooth out the wrinkles - a damp cloth is very easy to tear. When the glue dries, cover the pots with acrylic varnish. That's it, we can assume that a do-it-yourself planter for indoor flowers is made! Instead of a pot, other items can be used to work in this technique - teapots, mugs, vases and small boxes.
How to decorate a planter with twine
The second design option for pots for indoor plants- using ordinary twine. Additionally, you will need a glue gun. Everything is very simple - you just need to gradually apply glue to the surface of the pots, starting from the top and then going down. There is another option - to make a pot from scratch. For this purpose, you will need a thicker twine that can hold its shape. From it you need to form a pot, applying glue to the top of the rope. In this way, you can create not only pots, but also various vases, wide plates and other accessories in which it is convenient to store various little things. The third option is to use empty spools of wide tape. By connecting three pieces together and gluing the bottom of thick cardboard, you can also tie the resulting container with twine and get a full-fledged planter. Only from the inside it is desirable to coat it with varnish so that the bottom does not fall off from moisture.

Coloring pots for decoration
Clay pots are convenient because they are easily painted. You can give them any color, and then decorate with additional accessories. It is enough paint in two colors - white and black, as well as ordinary chalk to give the containers a beautiful and stylish look. Paint the pots first with white paint, and then draw a wide black stripe in the central part. When the surface is dry, use chalk to add some interesting drawing or inscription, for example, "Field me." You can paint the pot with white paint and instead of a black strip, make an inscription with black paint using a stencil. A stencil makes life a lot easier for a decorator - feel free to use them to create consistent style planters. In the interior and on any photo, a flower pot created with this technique with your own hands looks very stylish. Surfaces after complete drying of the paint can be given the texture and effect of aging with ordinary sandpaper.
Use of stamps and other artistic techniques for decoration
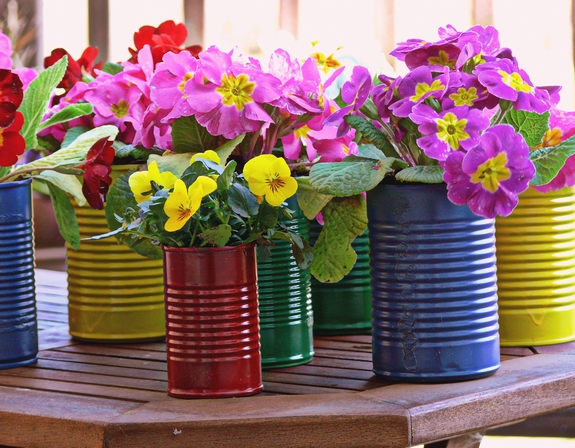
Stamps with letters also give an unusual effect. By simply painting the pot white, dipping the boles in black paint and signing the names of the plants to be planted in these containers, you will create versatile and stylish planters that will be easy to combine with the interior in any color scheme. An additional bonus of this method is that you will never forget the name of the flower if you sign the pot in which it is located. If you take some dark shade and gradually dilute it with white, you can make a smooth transition of tone from light to dark. It looks very nice. Special chic - hand-painted pots. You don't have to be an artist - you just need to choose a pattern in advance and follow it while painting the surface. Even ordinary tin cans, painted in different colors, can become decorative and stylish flower pots that can decorate any interior.
Painting pots with spray paint
Using acrylic paints, you get a smooth matte finish. Applying layer after layer, make sure that each previous one dries well. In order to make a striped flower pot with your own hands, purchase masking tape. If you stick it on the surface, you can get a flat, neat strip. Using gold or silver spray paint will spruce up the pot and give it a festive look. Before work, protect the table from splashes of paint by laying newspapers or plain paper on it. Light blue shades go well with gold: paint the clay pot blue, sealing the bottom third with masking tape. Then, when the surface is dry, cover the top with tape or foil and apply gold spray paint to the bottom of the pot. If desired, paint the stand in the same color. Let the paint dry for at least an hour before placing your plants inside. Add pink aquarium gravel to the top of the soil for a vibrant and vibrant color combination.
Papier-mâché, or decorating flower pots with paper
The papier-mache technique has long been known and allows you to create various unusual compositions, figurines and decorative elements. It resembles decoupage and is done with PVA glue, but not one layer of paper, but several, is used to decorate the surface. You can take not only beautiful images with a bright print, but also ordinary newspapers, book pages, just pieces of colored paper or leftovers from gift wrapping. Clean the surface of the pot and apply glue to it, and then glue the same pieces of overlapping newspaper in succession. Apply another layer of glue on top of the paper and let it dry. For additional decoration, use satin ribbons, ropes, ribbons or twine.
The easiest options for decorating a pot
One of the most simple ways how to make flower pots with your own hands - using fabric to decorate the surface. Small pieces of bright material are enough to change beyond recognition an ordinary plastic or clay container. The fabric is stretched and glued along the edges with a glue gun.

It is advisable to coat it with acrylic varnish on top to prevent decay in the lower part. Do-it-yourself flower pots for the garden can be made from other materials. Another simple option is to make a decorative planter from ordinary wooden clothespins. It is enough to connect them together in a circle with a glue gun, attaching one side to the surface of a pot that is not very attractive in appearance, until the circle closes. Another way is to use a low can of canned food or fish and simply fasten clothespins along its diameter, and then place the plant inside.

Recycling materials in garden design
For some reason, do-it-yourself street flower pots are most often made from tires, either simply by painting them in different colors, or by cutting them and turning them into figures that rarely please the eye and look stylish. But for the design of garden plants, you can use the same techniques as for indoor plants, however, the amount of work will be greater. It takes more time and effort to paint a large container, so for large flowers it is more convenient to take containers with a surface that does not require refinement. For this purpose, containers that are already out of order and cannot be used for their intended purpose are suitable: wicker baskets, iron tanks and troughs, watering cans, boxes. These items look stylish on their own, and look harmoniously with green foliage and bright inflorescences of plants. It is advisable to treat wooden containers from the inside and outside with special protective varnishes that do not allow the surfaces to get wet. A film can be placed inside the iron containers so that the water after watering does not cause corrosion. Some originals use the seats of old chairs, sinks, leaky rubber boots, and even shoes as flower pots. A do-it-yourself hanging flower pot can be made from PVC pipes, if you cut them in half, install plugs on the sides and fasten them together with a rope.
Cache-pot from bedside tables and drawers
You can create unusual designer flower pots with your own hands even from failed bedside tables and drawers. Even having two drawers from different tables, it is enough to simply create an unusual ladder-ladder if you fix them one above the other with wooden slats. Painted in harmonious colors, such a flower stand can become a real decoration for the garden. You can make do-it-yourself hanging planters for indoor flowers from small wooden boxes fastened to each other with thick twine.
Shell flower pot
If you have access to, or are willing to purchase, such beautiful decorating material as seashells, try decorating your pots in a nautical style. You can use gypsum as a base - dilute it to a pasty state, apply it to the surface of the pot and press the shells in random order. Leave until completely dry. Another option is to glue them with a glue gun. By combining different shapes and colors of shells, amazing results can be achieved. Add small pebbles, starfish and imitation pearls to your decoration to give an ordinary planter an elegant and expensive look. Very large shells are used as pots for small plants such as succulents.

Macrame technique for decorating plants
Macrame is gaining popularity again, thanks to the emergence of new materials and the rapid spread of educational videos on the Internet. DIY flower pot "Macrame" will allow you to decorate the interior in a rustic or modern style. The technique itself is quite simple - you just need to figure out how to weave knots from thick twine or threads correctly in order to learn how to work with patterns and make complex patterns. For macrame, clothesline and special knitting yarn are also used. Additionally, you will need pins, scissors, a small pillow for attaching threads and beads for decoration.
Features of macrame technique
It is important to choose high-quality and durable material, as flower pots made from rope for flowers with their own hands, especially after watering, can be very heavy. Those craftswomen who once wove baubles are already familiar with the basics of macrame technique. There are several types of knots in it, but four options are most often used: fixing, flat, rep and square. Before you weave flower pots with your own hands, you need to learn how to make a typesetting row and prepare the threads in a special way so that their ends do not fray. First, a loop is made on which the composition will be hung. To do this, several additional threads are tied to the main thread and knots are knitted from them until a loop is formed. Then they begin to weave according to the chosen pattern until a pot of the desired diameter is obtained.
Other ways to design flower pots
You can also decorate pots by sticking lace on the surface, using corrugated paper or cardboard, tree cuts and sticks, as well as satin ribbons.

Most materials are attached to the surface with a glue gun. Sometimes pots are decorated with pine bark to give them a more natural, rustic look. Burlap is often used - it is tied in a special way to hide a not-too-beautiful or disposable pot. Pebbles and tiles, laid out in a mosaic, are usually fixed to plaster, which is previously applied to the surface of the pot. Gypsum is a versatile material and very easy to use. The only negative is that you need to work quickly, since the viscous mass hardens very quickly. Choose your option and create stylish and beautiful containers for your green pets.
Such a decorative felt cactus with a bright flower can be a wonderful decoration for your table. It can also be used as a needle holder. Making a cactus in a pot requires a minimum of sewing skills.
Here's what you'll need:
- Felt material with a soft structure in dark green, black, sand colors.
- Small pieces of felt in rich colors (bright yellow and pink) for a flower.
- Threads of beige, black, marsh shades.
- Needle for sewing or embroidery.
- Scissors.
- Simple pencil, chalk marker.
- A piece of cardboard.
- A small amount of holofiber.

2. From beige felt, cut out one part for the pot: base, bottom and rim. From black felt, cut out a circle with a diameter of about 8-10 cm to simulate the earth.

3. Cut out 5-6 identical cactus parts from dark green felt. From pink and yellow felt, make one identical part of the flower. Make a strip for the middle of the inflorescence of any bright color.

4. Take a wide rounded piece (the base of the pot) and connect its short edges. Sew them with beige thread using a butt or overlap seam.

5. Take the bottom of the pot, sew to the base with an overcast stitch (or over the edge).

6. Take a narrow rounded strip, sew its short sections end-to-end. Then wrap the pot on top with this detail and sew along the inner contour. To do this, lay the finishing line in the form of a dotted line.

7. Then connect the top edges of the pot and the rim with an overcast seam or any other seam of your choice. Straighten the pot, give it a beautiful shape.

8. From cardboard, cut a circle the size of the bottom of the pot. It is needed for stability.

9. Place a cardboard circle on the bottom of the pot. Check if it fits well with the bottom in size.

10. Move the black circle towards you, pass the thread along its entire edge.

11. Pull the thread, put the holofiber inside.

12. Tighten the thread, secure the tie with a few stitches and a knot. Form a rounded part with a smooth spherical surface with your fingers.

13. Take out the pot. Put a ball imitating soil into a pot. If it does not completely fill the space of the pot, pull it out and put some synthetic filler on the bottom.

14. Put the soil in a pot, level with your fingers so that it is evenly distributed over the entire top.

15. Take the green elements of the cactus. Fold them in twos, sew overlock seam in pairs.

16. In the middle of the fastened parts, lay a vertical stitch, piercing the material through the needle.

17. Then sequentially attach all the parts of the cactus to each other, sewing their centers together.

18. Sew the main part of the cactus to the soil, capturing all the sections of the base.

19. Make sure that the edges of the plant are distributed evenly over the surface of the earth (you can first pin them with pins). Put the cactus with soil in a pot.

20. Take parts of the inflorescence, sew them to each other in the middle.