Plastic container icon. Keychains from the oven Do-it-yourself plastic keychains
Many people prefer to have accessories that emphasize their individuality. One of the options for such a detail is a keychain.
This is a versatile piece that can adapt in style to any thing, whether it's a backpack, keys, a wallet, a pencil case.

Such a trinket as a keychain can become a unique item if you make it yourself. A handmade keychain will be a nice gift for family and friends. This is one of the economical options for accessories.
There are many suitable materials for manufacturing that can be found at home.

Materials for manufacturing
A handmade keychain is not just a thing, it is a kind of talisman and amulet that can bring good luck to those who really believe in it. Most of the materials can be found at home, among them will be:
- paper:
- beads;
- threads;
- the cloth;
- tapes;
- plasticine;
- rubber bands.
For manufacturing, suitable: straps, corks, buttons, pencil remnants. The main assistant in the work will be fantasy. Thanks to her, an unpredictable long-awaited result will turn out.

Leather keychain for a backpack or handbag
Made of leather keychain will suit any style, from classic to sporty. Will be a good addition to the preferred image.

For work you will need:
- a small piece of skin;
- threads;
- fork;
- needle;
- glue;
- key ring.
The next step is the manufacturing process:
- A template is selected and a shape for the keychain is cut out.
- Glue is applied to the previously cleaned surface of the skin in order to more securely fasten the material.
- A border is drawn along which the thread will be threaded further.
- Holes are made with a sharp fork.
- A ring is inserted and the product is sewn with a thread.
- The edges of the skin are cleaned.

The finished accessory can be attached to a bag or purse to decorate or replace the slider.

Keychain from beads
Beaded accessories can be made in any colors, shapes and themes.

The most popular are animal figurines, vegetables or fruits, flowers and hearts. However, certain skills are required to perform such work.

To make a keychain, you will need:
- a set of beads of the desired colors;
- fishing line;
- scissors;
- scheme for work;
- key ring.

The scheme for work can be found on the Internet. For example, to make a keychain in the shape of a flower, you need:
- Cut the line and bend it in half.
- At one end, advance the beads and advance to the middle. Pass the other end of the fishing line through it.
- Put on the next row of beads one more bead. So repeat with each row. The petal will turn out to be more interesting if you thread beads of a different color along the edges, starting from 3-5 rows.
- Having reached the middle, reduce the number of beads in a row. The number of beads is optional.
- For the core of the flower, take a large yellow bead.
- Connect each element to each other, twist the fishing line and secure with a yellow bead.

The product can be attached to a bag or pencil case, which will serve as a decorative element.
Textile keychain
From small remnants of fabric, you can sew a keychain and present it as a nice gift to your friends. You just need to have basic knowledge.

To make an owl keychain you will need:
- fabric (multi-colored);
- lining;
- leftover felt (for eyes, beak and paws);
- pattern;
- threads;
- scissors;
- needle;
- buttons;
- keychain ring;
- piece of lace.

Note!

To make a keychain in the shape of an owl, you must first prepare a pattern and get to work.
- To begin with, the lining is connected to the fabric and processed. After, the details of the owl's body turn out to be obvious.
- Now the front of the owl is decorated. Felt circles are sewn in place of the eyes, and buttons are sewn on top, a beak is added.
- Next, the front and back are connected manually or with a sewing machine. At the same time, it is necessary to leave a small hole for the lace.
- A ring is attached to the sewn lace. After that, the hole is sutured.
Below are photos of key rings and their phased production.

Recently, products made of polymer clay and key rings, including, are gaining popularity.

The finished clay product is baked and for a long time pleases the eye with its brightness and originality.

The matter remains only with imagination and materials, some of which can be found at home or purchased in needlework stores.

DIY keychain photo

Note!


You can make not only a keychain, according to the site, you can even make earrings and a bracelet. But it's interesting if you make a panel))
Taken from US site
Final result looks like this:
But you can still make such bracelets and key chains :)


So, let's begin:
For this craft, we use plastic packaging (by the way, you can use a plastic lid from sour cream or kefir plastic jars).
At the moment it is transparent plastic. You can also use any polystyrene packaging or plate.
Check the label on the PS6 label to make sure you are using polystyrene material.

1. Draw your design on a flat piece of plastic (as seen in the picture, with a felt pen)

2. Continue painting your entire design, but don't go over the border or edge as that part will be cut off.

3. Try to make coloring pages on plastic far from each other.

4. Also circle the flower patterns with a contrasting outline, but on the other side of the plastic
This will create a stereoscopic effect and prevent the marker colors from mixing.

5. Cut off the plastic around the design (pattern). Cut to leave the same edge. Leave enough edge as the edge will shrink as it heats up.

6. Make holes with a hole puncher in the part you want to have as the top of the pattern.

7. Use aluminum foil already used (it may be wrinkled). Lay it on a baking sheet, heat the oven to 325 °

8. Put your plastic on the foil and
A universal selection of gift ideas for every occasion and occasion. Surprise your friends and loved ones! ;)
Hi all! The series of gifts will never stop, so today I offer you something interesting. You will find a fascinating article on how to make a keychain with your own hands.
This is a necessary, but at the same time, a miniature gift for all occasions. I have prepared 25 master classes and just original needlework ideas that will help you make the very keychain that you want.
First of all, advice: if you want to make a cool keychain, be sure to get good fasteners (rings, laces, etc.) At the end of the article, I will tell you what is better to buy and where to do it.
How to make a keychain with your own hands: 25 workshops and ideas
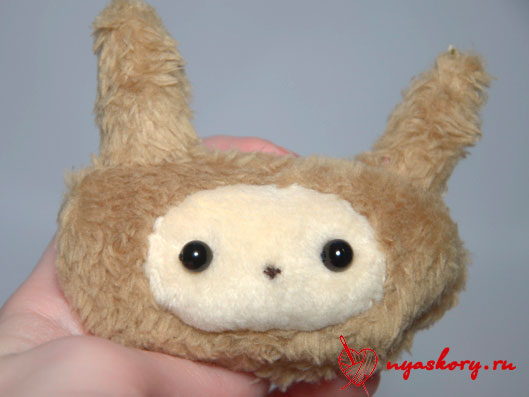
Soft keychain made of "Fluff" fabric
What do we need?
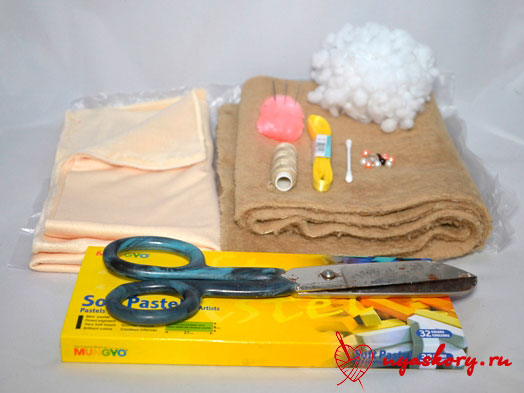
- velsoft (you can also use faux fur);
- fleece or minky fleece;
- satin ribbon for fastening;
- threads;
- pastel for painting the nose and cheeks (you can take acrylic paints);
- synthetic winterizer for stuffing;
- cotton swab;
- scissors;
- needle;
- eye beads.
DIY keychain - sew a bunny Pushka
Patterns Cannon (given in full size):
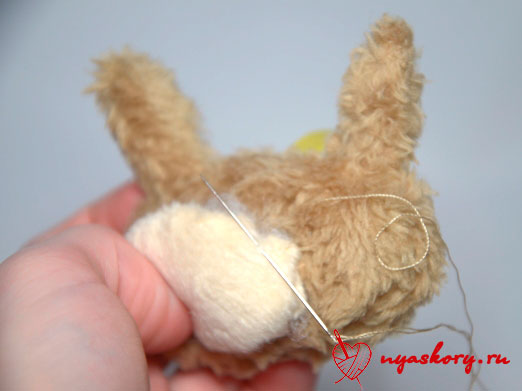
First, sew the ears, folding them with the right sides inward. Turn them out.

Now take a pre-prepared piece of tape. Fold it in half and attach it to one of the parts of the head approximately in the middle. Also attach the ears. So that they do not move out, you can attach them with a thread.

Now attach the second part of the head to our workpiece and sew, leaving a hole for eversion. Turn out the future keychain.

We fill the workpiece Cannon. Stuff tightly, but in moderation. Sew up the opening of the keychain with a blind stitch.

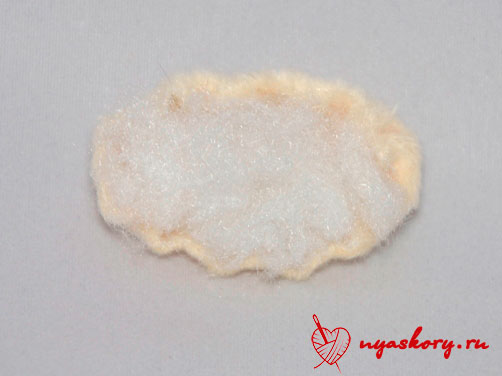
Take the muzzle detail and go over it with a running stitch. Pull off the future face a little (but not much).

Lightly stuff the muzzle with a padding polyester. Attach the muzzle to the head with a hidden seam. While sewing, gently hold the face so that it does not “run away”.
Now sew on the eyes and embroider a small nose on the hare with black thread, making a few stitches between the two eyes for this.
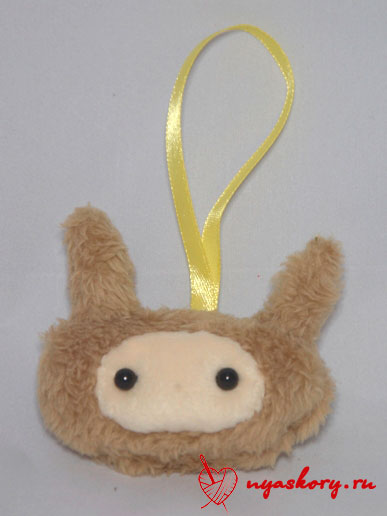
Take a cotton swab and lightly rub the desired color of the pastel chalk. Then just rub the muzzle of Fluffy in the cheek area with this cotton swab. You can also paint the nose area, but now with black pastel.
Keychain is ready

More Keychain Ideas
The matter will not be limited to one Fluff - as promised, 24 more cool ideas for making key chains.
Beaded orange
A fairly simple scheme, accessible even for beginners. You will need a thin fishing line and beads (for sure, monofilament is also suitable).

Blackies from fur
For them you will need a circle of black fur with a long pile, a little felt and the bindings themselves.

Leather keychains on the bag
A very stylish and simple option, obtained by folding a rectangle with a fringe at the ends into a tube. Inside is a piece of leather with a carabiner. By the way, any key chains of a simple shape from two parts can be made leather.

Cute animals for keys
Absolutely simple forms of such cats allow you to fantasize endlessly with colors, accessories and materials. And yes, you can use any mounts here.

Beads on the go!
You can make a very original accessory from wooden and plastic beads. Two beads, a keychain ring, knitting needles or sticks, paper tape, a brush, acrylic paints and an elastic cord will come in handy. First, color the beads as you wish, leave to dry on the needles. Fasten the elastic on the ring and thread the elastic through both beads, tie a knot at the bottom.

Fantasy on wood
All you need here is a wooden base and acrylic paints. And then only your artistic abilities and imagination.

Interesting key chains made of polymer clay
From it is just a fairy tale to sculpt simple little cuties. Cupcakes, animals, snacks - whatever! For you, as many as 6 ideas from this malleable material.


A great option for a gift for a guy for different holidays (including February 23) is two pieces of polymer clay puzzles. Roll out the pancake, cut out the puzzles, making holes for fastening, bake them and paint them.

Made of felt and wool
I want to show you some interesting ideas performance of different animals (and not only with the help of these materials).


Other materials
Something is just not used when they want to make beautiful and cool key chains and more! Look, for example, at these seals - they are made of special beads that melt when ironed. You can find similar ones in the departments for children's creativity.

But even there you have to keep your eyes peeled. More recently, I successfully purchased some elements for making key chains there, I share the links:
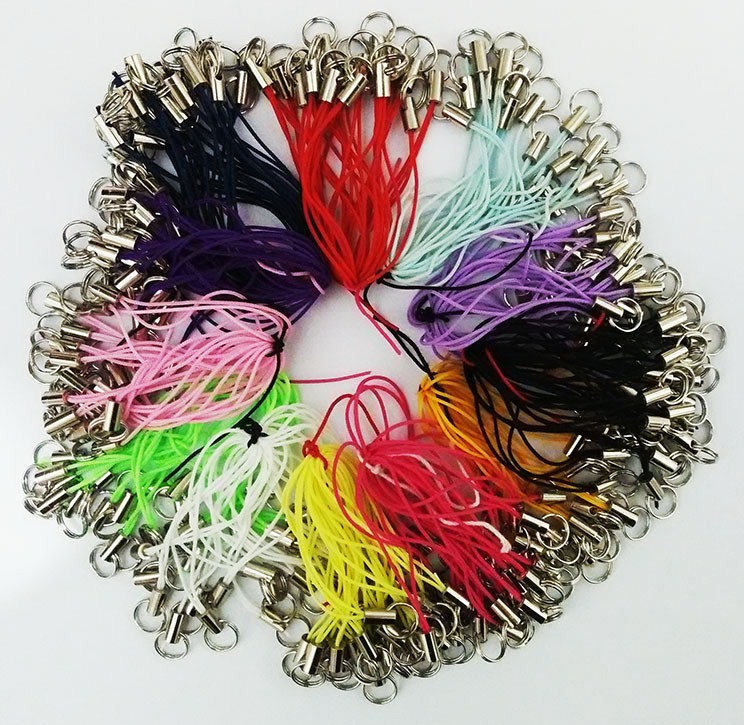
Thread fasteners- perfect for soft accessories.
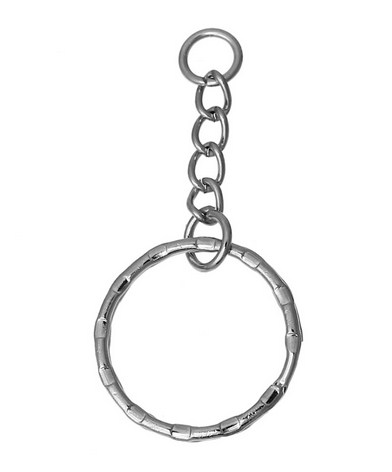
chain rings- good for all options.
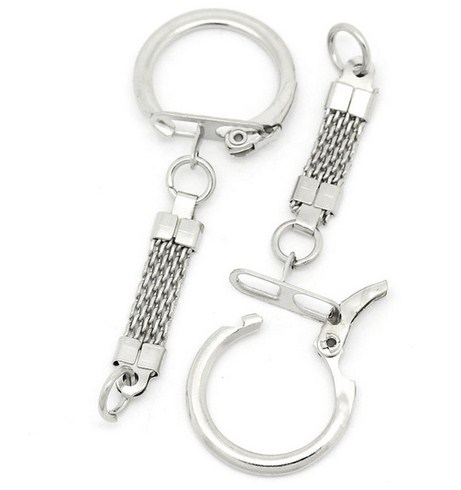
Rings with drop-down fasteners and a flat chain - can be used for solid key chains.
And finally small threaded loops for screwing into solid products (chains are attached to them).

These are the most profitable offers that I myself have used - I can recommend
On this I say goodbye to you! Share your impressions and a link to interesting material with your friends!
Sincerely, Anastasia Skoreva
Hi all. With you NataLime and today we will make Tumbler-style badges with our own hands, with which you can decorate a backpack, jacket, bag and anything. They are quite simple to make and we need a plastic container. They usually sell all sorts of cookies, cooking and so on. Well, in order to choose a suitable container, we need to pay attention to the packaging. There should be a PS-06 sign here.
We do not need the ribbed part of the container, so first we cut out a flat part from the container lid. You can use quite a bit of plastic from each container. 
Pre-print on the printer the pictures that you want to see on your icons. Pictures should be 3 times larger than the icon size. We apply plastic to the picture and with a permanent marker we outline everything along the contour. 
Try to circle carefully, but even if there are small gaps, it's not scary. They will fix themselves in the next step. The contour is ready and now we cut out the smiley face with scissors. 
All figures are ready. And now we need a baking sheet, which we previously covered with parchment. We spread the figures on it and send it to the oven preheated to 180 degrees. What happens to them? At first they all curl up and it seems that instead of badges you will get plastic tubes, but, fortunately, then they are aligned. We take out our blanks from the oven as soon as they become even. The plastic badges have shrunk in size by about a third, as expected, and the badge has become very dense, as if it was not made by me myself, but by professionals at the factory. All figurines are great!
And now it's time to breathe life into them with paint! I took acrylic paints and painted each element of the workpiece from the inside. There is very little left until complete readiness - glue special pins for badges on hot glue. 

Our icons are ready and now they can decorate and diversify any Look. They can be attached to a backpack, sweater, jeans, and anywhere else your heart desires. These icons are just amazing. They are bright, youthful, stylish, super-duper cool. I really liked them, and I hope you like them too. it’s difficult to make them, but you have to sit for a long time and painstakingly draw everything. And it’s quite easy to make them and the result is simply amazing! 
Of all the badges, I liked Wow, the panda and the palm tree the most. Which icon do you like the most? Please write in the comments.
The first badges for clothes appeared in ancient times. They served as a distinction that reflected belonging to a certain stratum of society. Then the badges became symbols of election campaigns, student societies. But gradually began to lose their official status. These elements have become an integral part of youth culture.
Today, badges are placed on jackets, denim and other things. Moreover, they look different - either creating a romantic, or strict, or rebellious image. Therefore, I propose to make a badge from a plastic container with your own hands.
We will need:
- transparent plastic container;
- brush;
- picture for the icon (any);
- permanent marker;
- nail polishes or acrylic paints;
- a small pin or base for a brooch;
- a piece of felt;
- glue gun;
- scissors.

Let's get started!
Step 1. Preliminary work: wash the container with warm water, remove stickers and glue. Let it dry well. Note! The PS6 sign must be on the container packaging, because. only this type of plastic shrinks in heat.

Step 2. Take a plastic container. We cut off only a flat part from it (we don’t need a corrugated part). We apply the cut plastic to the picture and circle the entire drawing along the contour. It is better to use a thin marker to make the drawing neat and clear. Please note that the icon blank should be two or three times the desired result, because. the plastic will shrink and the pattern will be much smaller.


Step 3. Cut out along the contour.

Step 4. Place the badge blank on a baking sheet lined with foil or parchment paper. Preheat the oven to 200 degrees. Place the baking sheet in the oven for 30 - 60 seconds. Soon the plastic will start to bend, but then it will straighten out and shrink. You can take it out of the oven. She became firmer and shrunk.

Step 5. While the workpiece is still hot, press it down with something heavy, such as a mug. So, it will become more direct.

Note: my blank before baking was 10 cm, and after - 3 cm.
Step 6. Let's start coloring. To do this, use nail polishes or acrylic paints. You can paint on any side. Feel free to paint over all the lines, because on the reverse side of the line will still be visible.

This is what it looks like from behind.

This is what it looks like from the front.

Step 7 Let's add highlights to make the ice cream more realistic. We put a small amount of nail polish on the toothpick and make small highlights on the badge. If desired, you can cover the badge with clear nail polish.